Tuesday 16 August 2011

So why so quiet?

If anyone's checked in here recently you might have wondered what's been going on - I've not posted for ages! Well here's a brief update......

1. I've been ill again :( the dreaded sinus infection has returned with a vengence! Cue anti-biotics and steroids.....

2. I joined Google+ and promptly deleted all my pictures off this blog and Me&Yu's blog (by mistake in one click of a button) so I've been spending time manually re-inputting each photographs (oh happy days)

3. I fell a little bit in love with Tumblr - and made a new Fashion Womble there!!! I love that you can make a post so easily - it's more photography based and you don't need to scour through pages and pages  - you can be inspired in instant. A photograph tells a thousand words......

Now I'm not saying that I'm leaving Blogger forever - just my posts will be more infrequent..... here's some pics of things I made recently that have appeared on my Tumblr recently. I'm wearing these together today!!!


Friday 17 June 2011

Birthday Present!!


I was lucky enough to get some money for my Birthday - so I treated myself to this gorgeous crochet cardigan from Topshop that I've had my eye on a while. I love it. I know I could probably have made it myself in a day or so but hey - sometimes it's nice to get something off the rack - and even better it was in SALE - Was £46, Now £30 - get one here.

Thursday 26 May 2011

Tutorial...How to Re-Mix a Skirt into a Dress


Okay so I've been promising to do this for ages. Ever wondered how we make things from one thing to another thing - well this is a classic Me&Yu re-work, step-by-step so you can have a go yourself!
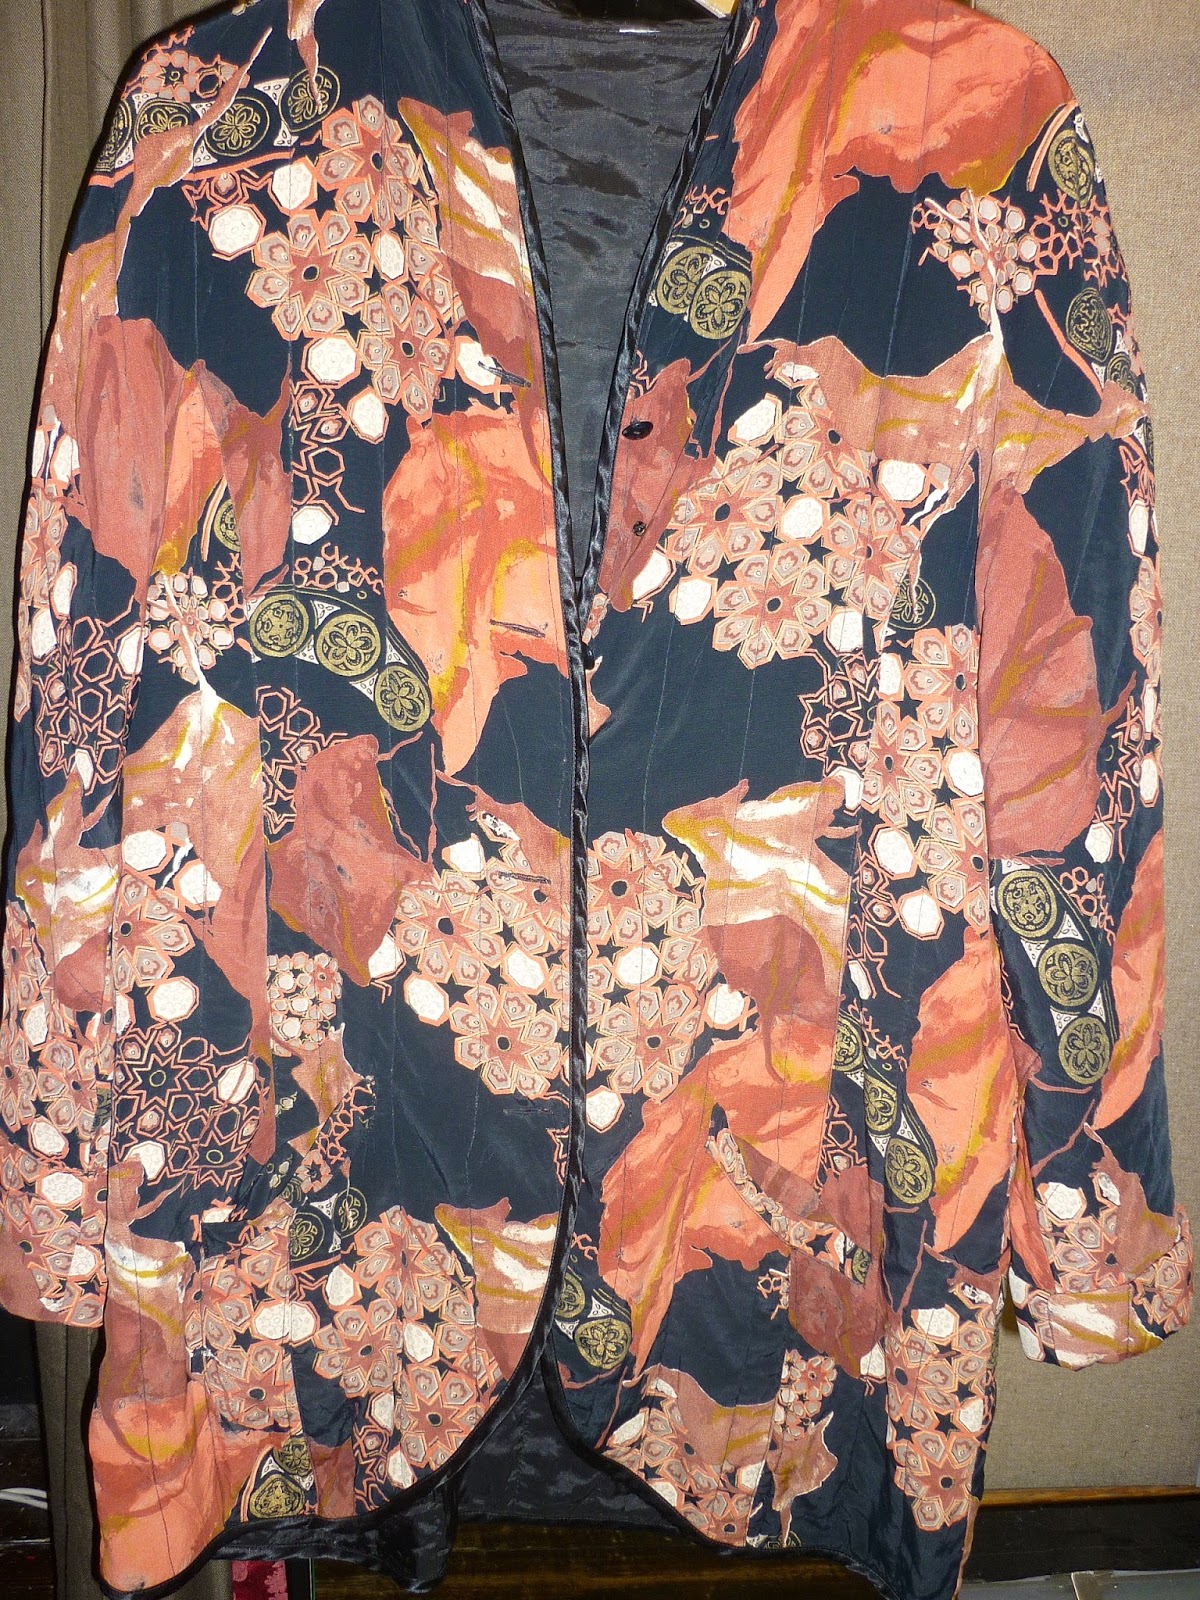


From This....


To This

What You Need
A long full vintage skirt that fits you (eg above)
Sewing Machine
Thread (in suitable colour)
5mm Elastic (in suitable colour - black for darker colours, white for lighter ones)
Buttons or Trims
Sharp Embroidery Scissors
Large Fabric Scissors


 Step One


Have a good look at your skirt, either on a mannequin or try it on.

Work out what 'bits' you'll have to work around.

This one has an elasticated waist and an annoying seam which you wouldn't want to fall in an awkward place. It's also pleated rather than gathered which can be tricky.

Step 2


Cut off the elastic with your sharp small scissors.

If you've a skirt with waistband and zip you'll have to cut off the waistband, unpick the zip and sew the gap closed.


 Step 3


You'll need to 'finish' the raw edge.

I use an overlocker, which cuts and finishes in a nice neat edge but you can use zig-zag stitch. 

*Notice that I've come nearer to that annoying seam - I'm going to use this as my hem so it won't interfere with the line of the dress.

Step 4


You need to mark where your elastic line will sit.

It needs to be lower than your underbust, but could also sit at your waist if you prefer.
Mine was 8" from the top edge. Mark all the way round with pins.

I decided to pin the pleats flat for a smoother line.

Step 5


Fold over and stitch your top hem from the wrong side.

You're making a little channel in which to sit your elastic so you need to make it over 1/2 cm in between the stitch line and the top.

Don't forget to leave a gap - you'll stitch this up later when the elastic is inside.

Step 6

This is the tricky bit - you're going to add your elastic to the WRONG side of your skirt.
You can use straight or zig-zag stitching - whichever you prefer.

Starting at a side seam with a single layer of fabric under your machine, attatch the elastic firmly with a  couple of backwards / forwards stitches.

Moving forward then you need to stitch the elastic down following the lines of the pins, taking the pins out as you go.

If that wasn't hard enough you need to stretch the elastic as you stitch - it's this that forms the gathers!!

***TIP- Just do a few inches at once!!***

Once you join your other elastic, overlap, backwards forwards stitch to finish and snip off the excess elastic


From the right side it should be nicely gathered - if not your elastic wasn't stretched enough ...
Unpick and tray again (that's the beauty of sewing!)


Inside view - the circle of elastic is clearly smaller than the skirt.

Step 7


Attatch a safely pin to the end of your elastic and thread all the way around your top channel.


When you reach full circle, thread the end back out of the hole and judge the right tightness.
It needs to sit at the top of your bust tightly without falling down but with enough stretch to get 
on and off.
Knot off the ends together, pull tight and cut off the excess.

Step 8


Poke the ends back into the channel and manipulate the knot away from the gap so you can sew this up.

Step 9


If you have a label to sew on you'll need to sew it looped to allow for stretch!

Step 10


The last step is to finish with some detailling - I chose 3 vintage buttons but often I use lace or bows. 


The finished article!!!


Wear with a skinny belt over the elastic line, cardie and brogues for a vintage princess look, heels and tanned for a summer night out!

Wednesday 25 May 2011

New Shoes


Not bought anything in ages - but these new shoe boot sandal type things were a MUST HAVE!

Last year I ended up in agony as I lived in my Converse all summer - they're just too flat and I was told off by my podiatrist. So these sandals fit every category of suitable footwear (low chunky heel, supported ankle, adjustable fit) and they are a fashionista's dream. What's not to like? Ah yes the price tag - at £65 they're not the cheapest shoes in the world but they are fabulous quality leather and well made, suitable for day or night, summer or winter with tights I know I'll wear them loads.

And if you want to grab a pair go to Office 

Tuesday 19 April 2011

Carboot Shopping Begins Again!

It's been ages since I've been to the Car Boot Sales. They run all through the winter near me, but generally the mix of sellers is so much better when you get a bit of sunshine. So after a winter of lazy Sundays we set out refreshed a car boot sale on Sunday.

I was mainly looking for re-sale goods for the shop - things like scarves, handbags and nice belts. But lately I've also been doing some nice re-worked pieces in the shop so I was also on the hunt for long skirts and mens shirts and I had a very successful day.

But even better I got a great new jacket for me! An absolute steal at £2, I've washed and dried it already and it's got it's first wearing today. Floaty printed viscose with floral and fruit print, it's oversize and slightly quilted - perfect for that 70's look that Topshop are making the most of at the moment.


And here's what Topshop have to offer along the same lines ...


I know which I prefer - mine!!!


Thursday 31 March 2011

Afflecks is a great place to shop!

Two things I have bought recently have been of a practical nature....


Some secondhand Reebok classic trainers which I bought off a fellow stallholder at Afflecks for a bargain £6. I've been looking for a standard trainer so I can start walking again. My recent spell of bad health has really knocked me for six so I'm definitely going to start my regular walks around Blackpool on my day off. All my other trainers are "too fashion" and aren't great for my poorly ankle - or would cause me to be laughed at. These are comfy and suitably chavvy enough to go un-noticed in my strange home town!


This perfect canvas rucksack was also bought in Afflecks - at Mashed Army Store on the second floor for £18. Gordon bought one in blue beacuse he's started cycling again and needed one big enough to fit his laptop in and I couldn't resist getting a matching one in black. 

I've had bag issues for a while which has led to being called a bag lady as I always carry 3!

On a daily basis I have to carry around:
Computer and lead
Lunch Bag (with cool pack)
Flask
2L Bottle of Water
Make-up bag
ipod / phone
camera
sketchbook
pencil tin
book / newspaper
sunglasses in case (get scratched otherwise)
purse and credit cards
coffee cup (on train days)

My bag to this point has been either a vintage brown leather satchel or a huge black leather one from Franceso Biasia that Gordon bought me a few years ago. Although both are big enough to fit everything in that I need to carry on a daily basis, if I actually put everything in the one bag I wouldn't be able to lift it as they are so heavy to begin with. So I've had to split into 3 separate bags of equal weight to save my poor back from breaking.

Now with this great lightweight canvas bag on my back (weight being distributed evenly) I only need to carry one other bag with my flask, water and lunch in - so much easier!

At home....


As I mentioned, the start of this year has all about saving not spending and it's slowly but surely starting to pay off - I will soon have enough money to pay for the much needed roof repairs at my little house....A typical ageing terrace it was built in 1895 and is well in need of a little tlc. I put some new windows in a couple of years ago and now it's time to address the main issue of the roof / damp before I can do any more decorating. 

I love that in this picture you can see one of the cats staring out from an upstairs window!

It's definitely getting to that time of the year to start 'doing things' and we couldn't wait to get outside into a bit of sunshine with a trip to the beach down the road - armed with an iphone and a Hipstamatic camera app....


Then we came home to hang out with the cats, and drink tea from vintage china and play with the cats - I love Sundays!!!!!